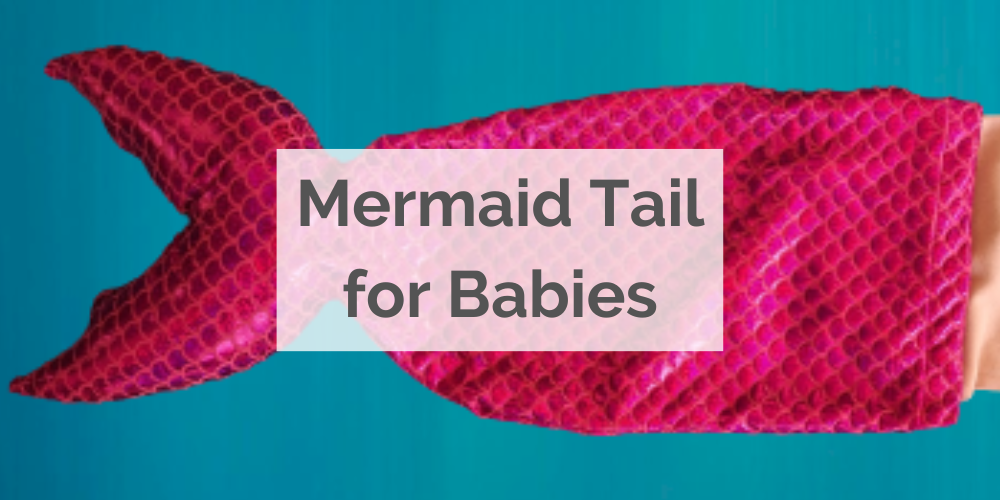
A DIY Mermaid Tail to dazzle your baby or toddler
Posted: August 22, 2023 Updated: April 4, 2024
One of my first steps into the Other Things category of my website, my journey making a DIY mermaid tail for my baby daughter!
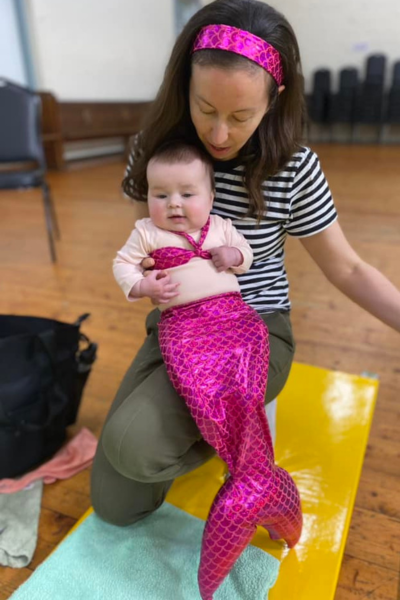
I have my daughter enrolled in a Baby Sensory class that takes places once a week. Each session is themed and next week’s theme is Book Week. Book Week is celebrated every year in Australia, and at schools across the country children dress up as their favourite story character. While my daughter is only four months old, the leader of the class encouraged us to dress up.
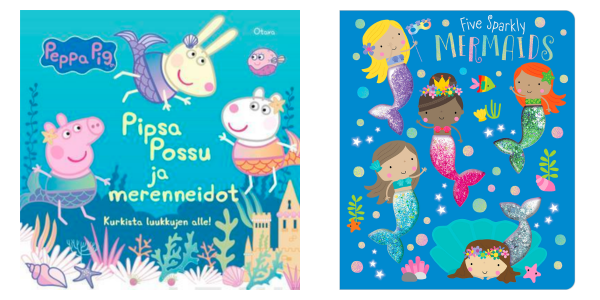
We’re raising our daughter to be bilingual as her father is from Finland. One of the few Finnish language books we have is Peppa Pig (Pipsa Possu in Finnish!) with a story about mermaid dress ups. I also got an English language book with mermaids last week.
So mermaid dress up seemed like a great idea. I told my husband about Book Week (they don’t have it in Finland) and you know what? He suggested a mermaid costume as well!
I figured making a tail is likely to be straight toward, needing just a bit of sewing and an elastic waistband. I did a bit of googling and found some photos for inspiration as well as a few Etsy stores selling ready-made mermaid tails.
My local craft store, Spotlight, had a few different fish scale fabrics. Although I’m not that fond of pink, I chose it because it would have good contrast with a blue or ocean themed background.
This article contains some affiliate links, they may earn a small commission to me at no extra cost to you. For more details see my Marketing Disclosure Statement.
Essential Materials:
- Stretchy fabric (opt for spandex or swimsuit material)
- Elastic (I used 12mm Birch elastic)
- Thread matching your fabric colour
- Paper to draw a tail template
- Sewing machine
- Scissors
- Pins
- Measuring tape
- Optional: hobby fill*, sequins, beads, or other decorative elements
Directions to make your baby mermaid tail
If you’d like to see your little baby as a gorgeous mermaid with their own tail then this is the DIY project for you! It’s a straight forward design that can be done in an afternoon – mind if you, if you’re making it for your baby you might not have an afternoon all to yourself!
I made this across a day during her naps, taking measurements when she was awake.
It’s the perfect design for a beginner with no complex stitching or moving parts. Trust me, I like sewing but I am not at all advanced!
Measure up your model.
I took the measures for my baby girl over two days and there was a huge difference! The first day I had 48cm around her waist and the second I had 44cm.
There must have been belly bloat the first time around. I ended up using 48cm as the fabric width and 46cm as the elastic width. It’s good to have the elastic measurement slightly smaller so that it is stretched and therefore snugly fitting when worn.
Note: if bub is in bulky nappies take this into consideration! The nappies we use are from Aldi and are quite thin. I hadn’t considered it during this make and got a bit of a surprise when I tried to put on the tail. It still fit perfectly but could have been a bit easier with a more generous fit.
Next measure the length of your baby from waist to feet. This is to ensure the tail is more than long enough. My bub’s measured length was 36cm from waist to feet.
Create Your Tail Template
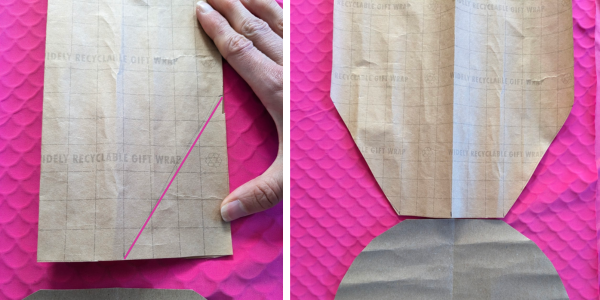
Using a large sheet of paper (I used brown wrapping paper) draw your template. Start by drawing the waist, it will be half the circumference of your baby’s waist. So 48cm will be a 24cm width. Draw two lines down either side the length of your baby, plus an extra five centimetres.
The total length for the rectangle template below was 43cm (36cm baby length + 7cm). If I made it again I’d do 5cm rather than 7cm, the tail was slightly long, but not too long.
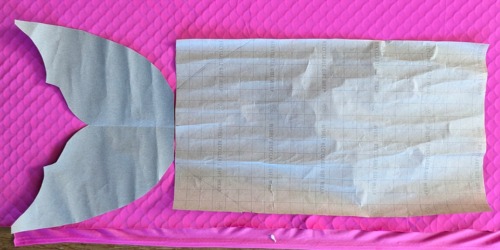
Taper the ends of the length, this will be where the tail begins. The tapering on my tail begins at 32cm, and the width at the narrowing is 11cm wide.
Draw your tail fin
How your shape your fin is totally up to you and what shape you are prepared to sew. I opted for a simple tail with a few small curves.
Note: Don’t be tempted to go too big with your tail, you’ll want it to be in proportion with your baby / toddler.
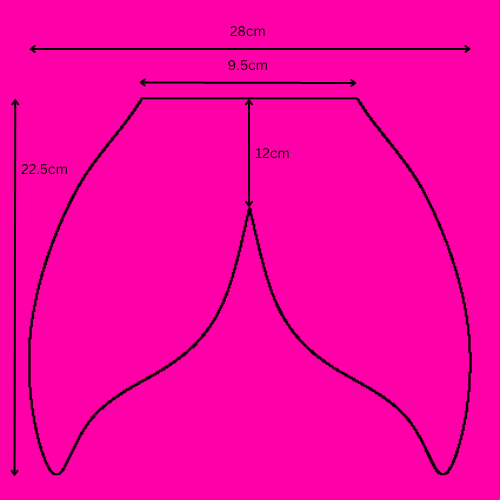
I did my tail design on a separate piece of paper so that I could fold it over when cutting the template, ensuring both sides of the tail are symmetrical. I drew mine free hand, below is an image with the dimensions to give you an idea of proportions.
Once you’re happy with your template, lay it on your stretchy fabric and secure it with pins. If you’re using scales fabric, double check your scales are facing the right way for both pieces of fabric.
Trace around the template to transfer the tail shape onto the fabric. Cut the fabric, leaving some extra fabric (about 1.5 cm) around the edges for sewing.
Note: If you don’t have tailors chalk, or like in my case you couldn’t see the colour on the fabric, leave the template in position with pins when you cut the fabric.
Sewing the Pieces Together
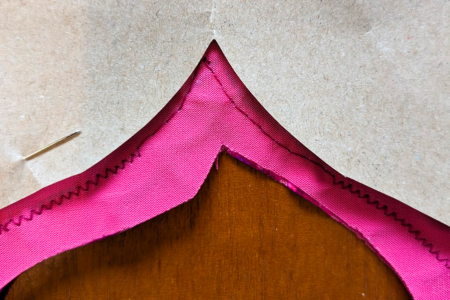
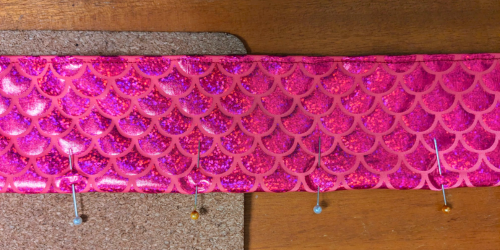
Place the two tail pieces with their patterned sides together and pin the edges.
Using your sewing machine, stitch along the edges with either a stretch stitch or a zigzag stitch. These stitches allow the fabric to move and stretch without damaging the seams.
Optional: I found it quite hard to manoeuvre with the zigzag stitch. So when I got to the curvy part of the tail I changed to a straight stitch. This was much easier for me.
If you’re worried at all about the size now is the time to do a fit test.
Once you’re sure that you are happy with the size you can proceed with the waist hem and elastic.
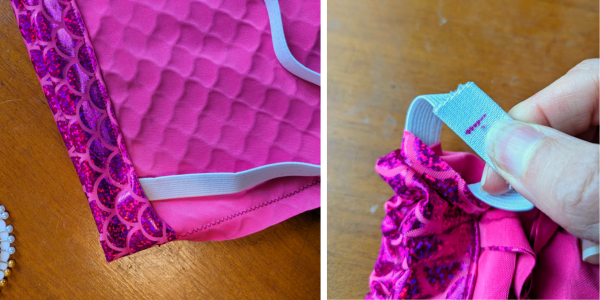
Insert the Elastic Band
Measure the circumference of your child’s waist and cut a piece of elastic to match. Mark the elastic with a marker slightly shorter than that measurement. I went 2cm shorter, 46cm down to 44cm.
To create area for the elastic to reside, fold the fabric at the top of the tail down. Check there is enough space to comfortably fit the elastic.
Pin the fabric in place. Since it won’t be seen you can do a basic hem with one fold. If you’d like it a little more neat and tidy fold the fabric again and pin as per my picture below.
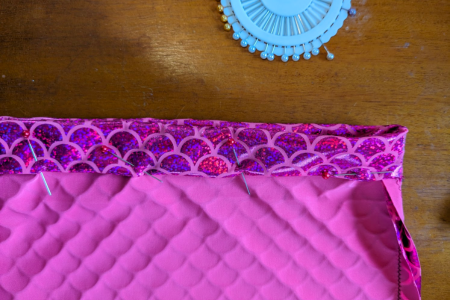
Using a straight stitch sew along the hem line, leaving 3cm gap without stitching.
Attach a safety pin to one end of the elastic and thread it through the open waist area. Carefully
guide the elastic all the way around, ensuring even distribution.
Overlap the ends of the elastic and securely stitch them together using a zigzag or stretch stitch. Then sew closed the small opening to complete the waistband.
Final Touches
Your baby mermaid tail is almost done! Trim any excess fabric, especially around the fin area, to achieve clean edges.
If you want a 3D effect on the tail you can fill it with hobby fill or even cut a piece of foam to size. For my tail I used standard hobby fill made of polyester. You can also buy this on Amazon.
Note: if you need to wash your tail in the future be sure to remove all the hobby fill before washing.
If you’re feeling adventurous, consider adding sequins, beads, or other decorative elements to personalise your mermaid tail.
Your baby mermaid tail is complete!
That’s it, your mermaid tail is ready to wear at your baby’s first Book Week celebration, Halloween party or just around the house. I hope you enjoyed my creative tutorial, it’s the first one I’ve ever written so please do give me feedback in the comments, especially if I’ve missed something!
Be sure to pin my post!

Accessories for your baby mermaid tail
You might have noticed I made a matching bikini top to go with my baby mermaid tail. Luckily, it’s super simple.
I only made it because I had a decent piece of leftover fabric. I measured the width of the band against my baby’s chest (7cm) and did a basic hem (I did not make it tidy) and fixed it in place with a straight stitch.
Rather than playing with fiddly buttons I made the fabric extra long (72cm) so I can just tie it in a knot at my baby’s back.
For the halter tie I folded a thin strip of fabric (60cm long) inside out and stitched down it with the machine. I then inverted it and stitched the ends. I wouldn’t recommend doing this, turning the fabric inside out on something so narrow was incredibly tedious and time consuming. It took me over thirty minutes.
Instead fold it the fabric right way around and do a French hem. Or better yet, get a matching or complementary coloured ribbon.
On the day of the class I dressed my girl in a plain long sleeve bodysuit from Kmart. I bought it for this costume as our rompers are all patterned.