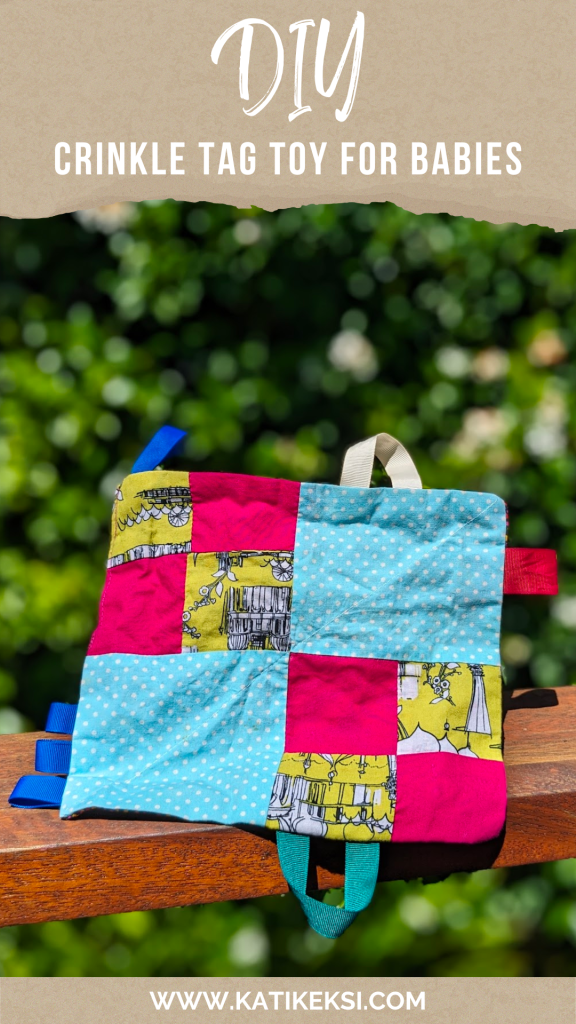
Crinkle Tag Toy for Baby
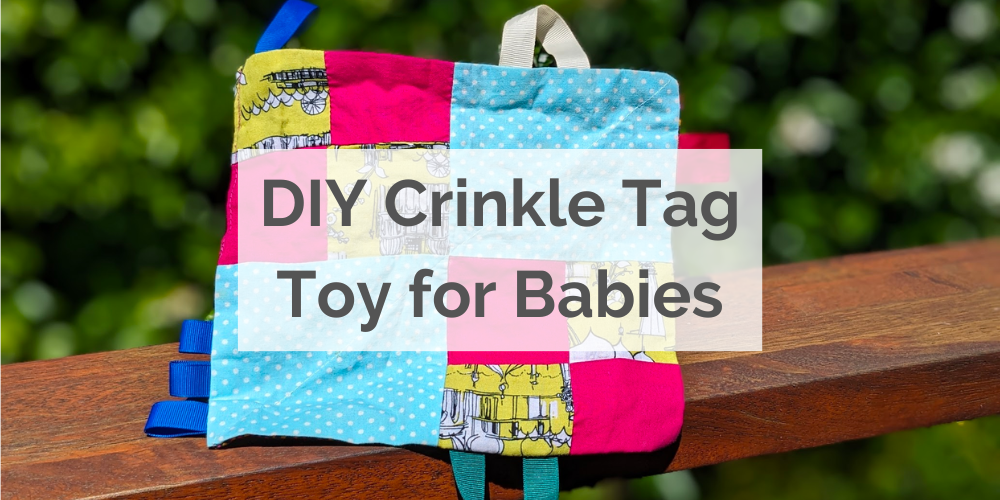
Well I didn’t think I’d be doing another craft post so soon but I have been meaning to make a crinkle tag toy for my baby. Why? Because as far as DIY baby stuff goes, this is one of the easiest. Certainly a lot easier than the mermaid tail I made her a few months ago!
What is a crinkle tag toy?
Crinkle tag toys bring together two things that babies love. If you’ve ever given a baby a new soft toy you might have seen that they went straight for the tag with the wash instructions. Completely ignoring the lovely plush bunny / teddy you’d thoughtfully got them. This is where the tag concept comes from.
The tags make it easy to hold and play with and by using different fabrics and ribbons you can give even more sensory exploration.
The crinkle aspect is again about sensory entertainment. The crinkle fabric inside crunches and crackles under baby’s grip providing additional stimulation and holding their attention.

The perfect upcycling project
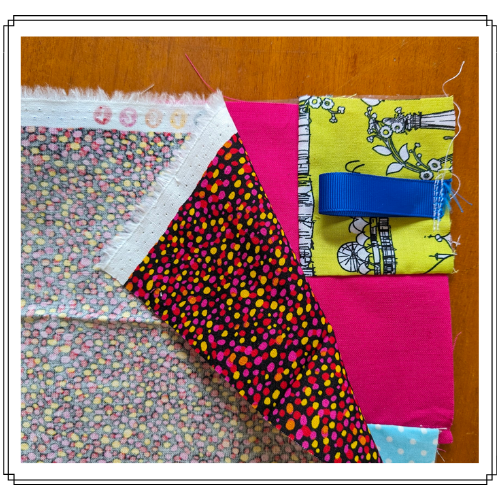
For any avid sewers you’ve no double got a stash of random small bits of fabrics. Those little pieces you’ll use one day but haven’t yet found the project. This is your day, you’ll finally use them just like I did for mine.
Because the crinkle tag toy can be any size you can make it as small or as large as you like for your baby or toddler. Finished up, my crinkle tag toy measures about 20 x 20 cm (?? x ?? in).
All the ribbons for my crinkle toy came from my gift wrapping box. I keep all the ribbons from gifts I receive so that I can reuse them in future projects.
Note: When choosing fabrics and ribbons ensure they are ones safe for baby to put in their mouth. Avoid designs with glitter, sequins or other applications that could detach.
No time at the moment? Pin this post for later!
Benefits of a crinkle tag toy for your baby
- Stimulation, this toy offers many sensory experience through it’s bright and contrasting colours, different textures and of course sounds.
- Easy portable, and non-breakable! So you can pop it in your baby bag and take it with you where ever you go.
- Machine washable. This is a big one for me. My girl loves her soft toys but accidents happen, and let’s face it, milk vomit is not easy to clean off a fabric toy. This crinkle tag toy is machine washable (cold wash preferred).
ESSENTIAL MATERIALS:
- Fabric pieces of any shape or size
- One large fabric piece for the ‘back’ (optional)
- Crinkle fabric – or make your own
- Thread – any colour as most stitching will be internal
- Ribbon of various textures and colours
- Sewing machine
- Scissors
- Pins
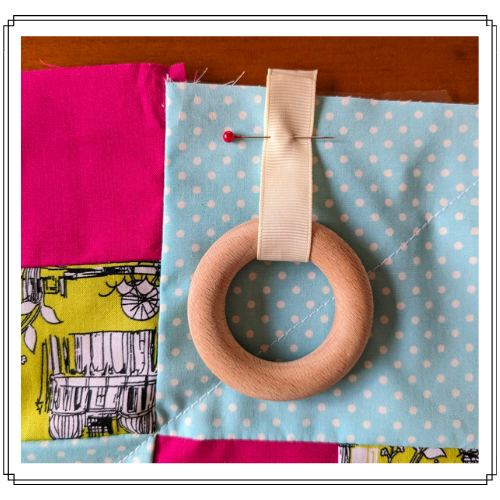
- Optional: a wooden ring or plastic ring as an additional teether.
Gather your materials
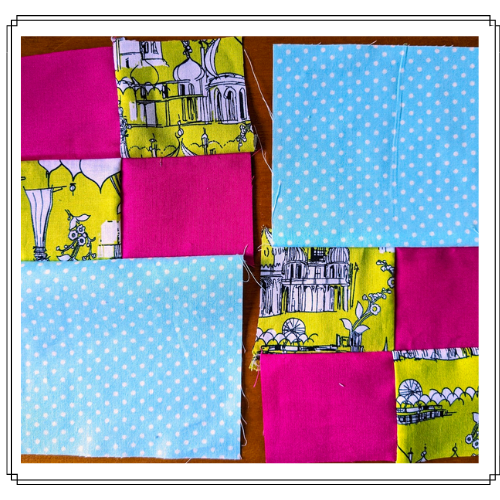
The first thing you want to do is gather your fabrics and arrange them to shape to form your final shape.
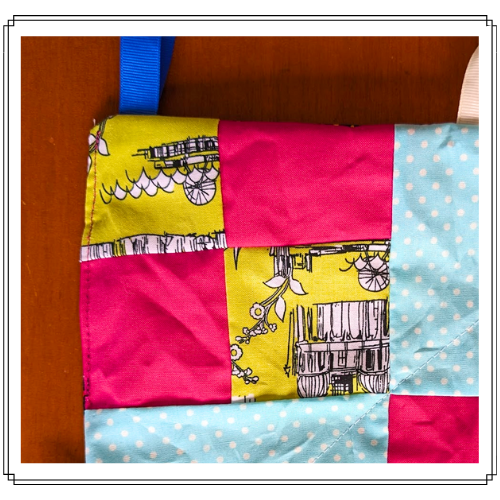
I had a few squares of fabric from a quilting magazine that had been sitting around for years, so this formed the quilt side of my tag toy.
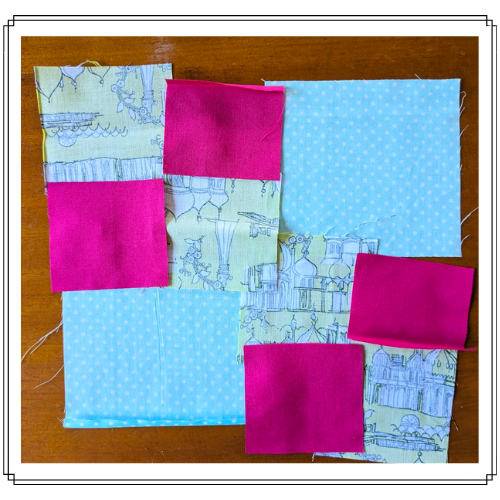
For the other side I was feeling lazy so I opted for a single piece of fabric. If youd’ like a quicker project overall simply use two pieces of fabric, one for each side. Opt for different colours to provide maximum contrast for the baby.
If you don’t have or can’t purchase crinkle paper (it’s very hard to find in Australia) you can easily make your own. Simply use an empty cereal bag. I used one from these Tiny Teddy cereals as the bag is quite large. Empty out the cereal (or eat it all), cut the bag open and wash thoroughly. Leave it to dry fully before using – ideally do this the day before the project to ensure it is dry.
Sew your quilted side
Skip this if you’re doing single fabrics.
This is my first time quilting and for a moment I was a bit worried about how it would turn out. Then I realised, it’s for my baby, she’s going to love this. She won’t be looking at wonky lines or misaligned sections.
Place your tags
You can do as many or as few tags as you like, it’s completely up to you. I chose ribbons that were reasonably wide so ensure they can be properly affixed. If a ribbon is too thin it may not stitch into place well and you do not want it coming loose.
When arranging the ribbons place your fabric pattern side up and all your ribbon loops facing in.

If you’d like to attach a teething toy to one of the loops you need to do this now. I have included a photo to demonstrate but please note I didn’t include one in my design so you won’t see it again in the instructions.
Sew your tags in place
Sew the tags to the fabric with a straight stitch in any cotton colour. For each tag I sewed them over and reversed. This way they are completely secured in place. Sew the ribbons about 5mm from the edge or 1/4 inch.
Layer your pieces and sew them in place
If you haven’t already, trim your crinkle fabric to size. It should be the same size as the fabric pieces.
To layer the fabric ready to sew first put down the crinkle paper, then the piece with tags facing up. Finally put the last piece down patterned side in.
Using a straight stitch sew around the outside of the fabric with a 1cm or 1/2″ seam allowance. Leave a small opening about 10cm or 4 inches. Backstitch the start and finish to make the seams secure.
Note: If you’ve attached a teether the gap must be big enough to fit the teether through.
Trim any excess fabric and threads from around the outside. Take care not to cut into any seams or where the ribbons have been attached.
Turn the crinkle tag toy inside out. Fold in the fabric from the opening and pin it in place.
If required you can iron the square on a cool setting to help smooth the toy. Take care not to have it too hot with the crinkle fabric inside.
Finishing the baby crinkle tag toy
You have a few options when finishing your crinkle tag toy. If you want to be quick can simply stitch closed the open seam by edgestitching as close to the edge of the fabric as you can.
If you’d prefer a more uniform finish you can stitch the entire edge of the toy. This has the added benefit of reinforcing the seams, while giving it a neat professional finish.
However if you have a quilted side like mine you may find it difficult to find a suitable cotton to match all the fabric. It’s absolutely fine to skip this step – I did.
Finally you can add a X pattern across the toy. This is useful as it prevents the fabric from puffing out, giving it a neat flat finish.
To do this, using a ruler from opposite corners mark a line in tailors chalk. Repeat with the other opposite corners. Sew a straight stitch along the line, backstitching at the start and finish.

Your tag toy is now ready to use! If you’ve made this toy from odds and ends in your fabric box I’d suggest putting the toy through the wash before giving it to baby. Just to make sure it’s extra clean from any dust or fabric marker / chalk.